
Possessing a strong chest has a variety of advantages!
From the purely practical—such as better posture, enhanced shoulder stability, and higher calorie burns from the additional muscular mass—to the purely attractive.
More than just physical definition, chest strength helps support the surrounding muscles and joints while also enhancing posture and respiration.
The secret is choosing which workouts to prioritize.
While increasing muscle might take time, creating a powerful chest doesn’t have to be time-consuming.
Below are the 17 best chest exercises for you to have the body you desire!
1. Bottom-up Press

Hold a kettlebell in the right hand in a ‘bottom-up’ posture by grasping the top of the handle such that the bottom of the kettlebell is facing up.
To keep the kettlebell balanced, maintain a firm hold.
Push the right foot into the ground to move the body’s weight forward, while keeping the right arm straight overhead.
Lower the weight by pulling the right elbow back to the rib cage.
2. Cat-Cow

Kneel on an exercise mat on the floor, with your knees and feet hip-width apart and your feet dorsiflexed (toes pointing towards your body).
Slowly bend forward to lay your hands on the mat, directly beneath your shoulders, shoulder-width apart, with your hands facing front.
Adjust your hands and knees as needed so that your knees are now beneath your hips and your hands are squarely beneath your shoulders.
Firmly contract your core and abdominal muscles to keep your spine in a neutral position, preventing any drooping or arching.
Upward (Cat) Phase: Exhale gently and engage your abdominal muscles, raising your spine toward the ceiling for 10 – 15 seconds.
Many things in the world.
Downward (Cow) Phase: Slowly relax and surrender to the influence of gravity.
Allow your stomach to sink towards the floor (this will increase the arch in your low back) and your shoulder blades to fall together (move towards the spine).
Hold for 10 to 15 seconds before returning to your starting position.
3. Chest Press

Lie face up on a flat bench and grasp a barbell slightly broader than shoulder width.
While lifting the bar from the rack, press the feet into the ground and the hips into the bench.
Allow the elbows to flex out to the side as you slowly drop the bar to your chest.
Stop until the elbows are barely below the bench and press your feet into the floor to return to the starting position.
4. Plank-ups
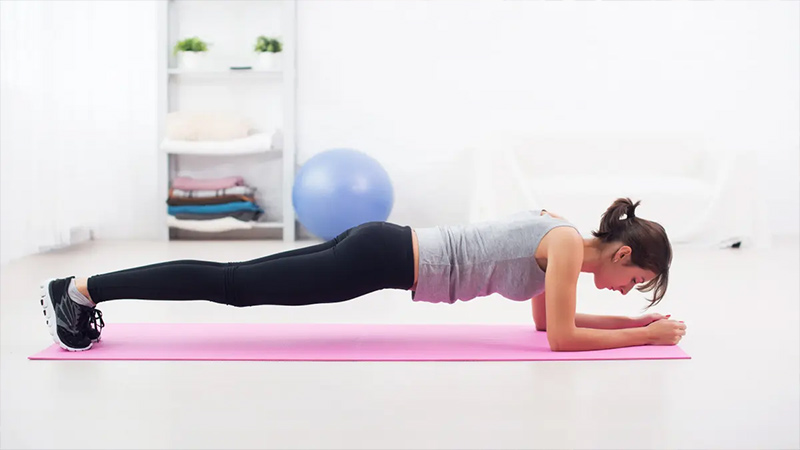
Begin in a push-up posture, with your hands under your shoulders and your legs straight behind you.
Squeeze the thigh and glute muscles to maintain the torso and legs straight, then drop to the elbows one at a time.
Return to the push-up position by pressing the hands into the floor one at a time from this posture on the elbows.
An alternate position is to retain your elbows close to your sides throughout the downward phase while turning your hands to face front.
This may lessen strains on the shoulder joint by shifting the attention from the chest muscles to the triceps.
5. Power Push Down
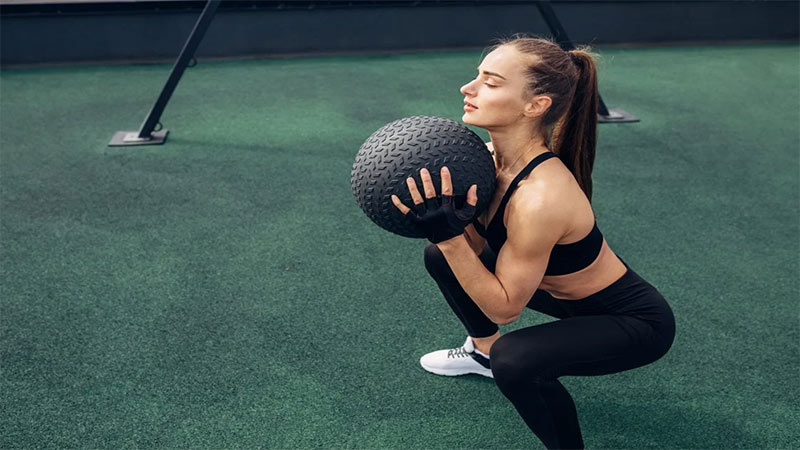
Lean slightly forward at the hips while standing, maintaining your back straight.
Start with the medicine ball at the chest and press it firmly toward the floor beneath the chest while keeping your elbows out to the sides.
When the ball bounces back, grab it and rapidly repeat.
This exercise isolates and stabilizes the muscles in your shoulders and lats.
Lessening the shoulder’s limitation on mobility helps reduce the risk of discomfort and damage.
Try doing this exercise next to a mirror so you can watch for any unintentional movement in your hips, ribs, shoulders, or low back.
6. Push-up

Start by bringing your feet together behind you while you kneel on a floor or workout mat.
Place your hands shoulder-width apart on the mat with your fingers pointing forward or slightly bent inward. Slowly lean forward to achieve this position.
Put some weight forward gradually until your shoulders are directly above your hands.
Reposition your hands as necessary to allow your body to fully extend without any hip or knee flexion.
By tightening your glute and quadriceps muscles, core and abdominal muscles, and by positioning your head in line with your spine, you may stiffen your torso.
Put your feet together, dorsiflexing your ankles (toes pointed towards your shins).
Lower your body slowly towards the floor, keeping your torso tight and your head aligned with your spine.
During this downward phase, do not allow your low back to slump or your hips to climb upwards. Lower yourself till your chin or chest touches the mat/floor. During the lowering phase, allow your elbows to flare outwards.
Consider pushing the floor away from you for more strength. Allow your low back to drop and your hips to lift up. Push until the arms are entirely stretched at the elbows.
7. Push-ups with Single-leg Raise

Start by bringing your feet together behind you while you kneel on a floor or workout mat.
Slowly lean forward and place your hands shoulder-width apart on the mat with your fingers pointing forward.
Put some weight forward gradually until your shoulders are directly above your hands. Reposition your hands as necessary to allow your body to fully extend without any hip or knee flexion.
By tightening your abdominal and core muscles, stiffen your body, and position your head so that it is in line with your spine.
Put your feet together, dorsiflexing your ankles (toes pointed towards your shins).
Slowly lower yourself to the ground while keeping your head and torso stiff and in line with your spine.
During this downward phase, do not allow your low back to sag or your hips to rise upwards; instead, tighten your glutes (buttock) and quadriceps (thigh) muscles to establish core stability.
Lower yourself until your chin or chest touches the mat or floor.
Your elbows should be kept tight to your sides or permitted to extend out slightly.
As you press up, extend your left hip to lift your left foot off the floor while maintaining your left knee extended.
As you lift your left leg off the floor, try not to rotate your hip.
Avoid letting your hips creep up or letting your low backdrop.
Continue pushing until your left leg is fully extended off the ground and your arms are fully extended at the elbows.
Hold this position for a little while before resuming your original position. Repeat with the other leg.
8. Stability Ball Push-Up

Place both feet and hands on the floor, hip- and shoulder-width apart, and lie prone (on your stomach) on top of a stability ball that is appropriately inflated (one that compresses about 6″ under your body weight).
Walking yourself backward gently until your stomach is squarely over the top of the ball with both legs extended and both feet firmly planted on the ground, hip-width or further apart requires a light contraction of your abdominal/core muscles.
With your arms lying on the ball, your head, torso, and legs should all be in a parallel position.
Put your elbows by your sides and your hands to the sides of the ball towards the top, with your hands exactly beneath your shoulders.
Consider squeezing the ball between your hands to increase strength and stability.
Exhale and gradually drive your body upwards until your elbows are completely stretched but not locked.
Keep your head, body, and legs aligned, and your elbows at your sides.
Hold this stance for a moment.
Inhale and slowly lower yourself to your starting posture during the downward phase.
9. Standing Anti-rotation Press

Standing with the knees slightly bent and the feet hip-width apart, the hips should be straight.
The cable pulley should be square to the right of the torso, at around chest height (while pressing the handle away from the body, the cable should be parallel with the chest.)
Grip the grip with both hands, elbows bent at the sides, and fingers knotted together.
Press the handle forward while maintaining a tall, straight back.
Hold the position for two to three seconds before gradually bringing the elbows back to the sides.
10. Standing Chest Stretch

Stand with your arms at your sides, feet hip-width apart, and toes pointed forward.
Brace your spine by tightening your abdominal muscles, then bring your shoulders back and down without arching your low back by depressing and retracting your scapulae.
Action: As you exhale, externally rotate your shoulders (turn them out) and adduct your shoulder blades (bring them together), which will pull your shoulders back. Hold for 2-4 repeats of 15–30 seconds.
Be mindful to keep your alignment neutral whether including the partner assist or anterior deltoid stretch.
Although your chest will naturally lift up and out, resist the urge to push it forward.
11. Supine Snow Angel

Lie supine (on your back) on a sturdy surface with your legs bent until your feet are 12 to 18 inches from your buttocks.
Put your arms at your sides, fully extended elbows, and palms facing in.
For 30 seconds, take deep breaths to relax your body and let gravity gradually draw your shoulders and lower back toward the floor.
Without raising your hips off the mat or floor or increasing the arch in your low back, depress and retract your scapulae (draw your shoulder down and back).
Your low back should be flattened into the mat by engaging your core muscles, and you should maintain this position throughout the exercise.
Slide your arms out from your sides, producing a 45-degree angle with your body, and keep your upper arms in touch with the mat/floor.
Bend your elbows to a comfortable angle while keeping your wrists neutral (aligning the backs of your forearms, wrists, and hands).
Exhale and twist your upper arms slowly, sliding the mat/floor to an end position where your hands contact above and your elbows are comfortably bent.
Avoid arching your lower back as you spin overhead by keeping much of the back of your upper arms, forearms, wrists, and hands in touch with, or near, the mat/floor.
Exhale and slowly rotate your arms back to the beginning position while avoiding arching your lower back and keeping your upper arms, forearms, wrists, and hands in touch with or close to the mat or floor.
12. Medicine Ball Lunge to Chest Pass
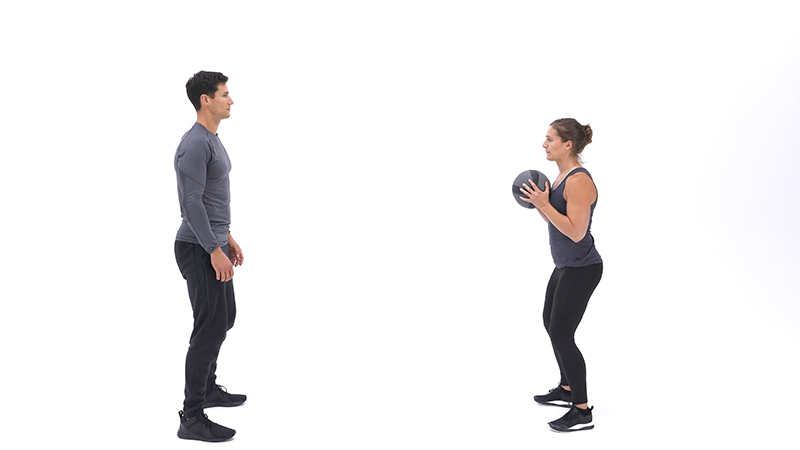
Each partner should maintain the spine in neutral (normal-to-flat), shoulders depressed (no shrugging), and scapulae retracted while standing on the floor with both feet hip-width apart, with your bodies directly facing your partner (or wall/rebounder) and at least 5-8 feet apart (squeezing shoulder blades together).
Maintain an elevated chin, a spine-aligned posture, and a high chest (raised). Right in front of your chest, firmly grasp a medicine ball in your hands.
Tighten and brace your abdominals, and engage your glutes to keep your hips thrust forward. Your eyes and your head should be directly focused on the target.
To establish a target for the partner tossing the ball, the partner ready to catch the medicine ball should stand with his or her feet firmly planted on the ground, hips slightly flexed, abdominals engaged, and both hands held straight in front of the chest.
13. Lunges

Standing with your feet shoulder-width apart is a good idea.
Placing your hand on your hips is a good idea.
With your right leg, take a huge stride forward. Make sure your knee does not travel past your toes by bending it too far forward.
The left knee will practically touch the floor.
As you go, alternate the legs.
For each leg, try to complete a set of 8 to 12 reps.
This exercise should be done on alternate days, especially if you are using weights, to allow for a day of recuperation.
The quadriceps, glutes, and hamstrings are all strengthened and toned with this workout
14. Curls of the biceps

Because you can do this while sitting, it’s a wonderful workout to perform if you spend a lot of time on the phone.
Select appropriate dumbbells or any household item that you can readily grip. With the dumbbell in your hand, take a seat.
You should bend forward a little to allow your triceps to lean on your leg for support.
Then raise the weighted arm to shoulder height and lower it.
As you lift the weight, exhale, and as you lower it, inhale.
15. Side Abductor Lifts

To discover how to complete this workout, see the video below.
These muscles are crucial since you utilize them on a daily basis to run, climb into and out of a car, and ride a bicycle.
They’re also crucial for maintaining core stability and preventing pelvic tilting.
The side-lying hip-abduction exercise was the best exercise for activating the gluteus medius with little activation of the tensor fascia latae and anterior hip flexors.
The adductor works small muscles, called the hip adductors and hip abductors.
Small muscles don’t require much energy, so working these particular muscles will not burn much fat — not enough to make your thighs slimmer.
16. CKC Parascapular Exercises

Kneel on an exercise mat on the floor, with your knees and feet hip-width apart and your feet dorsiflexed (toes pointing towards your body).
Slowly bend forward to place your hands on the mat, shoulder-width apart, with your fingers pointing front.
Adjust your hands and knees as needed so that your knees are directly beneath your hips and your hands are squarely beneath your shoulders.
Excessive drooping or arching of the spine can be avoided by tightening your abdominal muscles.
Slide your right hand forward to a staggered stance, 6 to 12 inches in front of your shoulder. Internally rotate both arms, bringing the tips of your fingers to the center.
Hold this posture for 5-10 seconds, then repeat it 2-4 times. Switch hand positions again.
17. Feet elevated incline press

Why: Overarching the spine when pushing is a typical faux pas.
Although you might be able to employ greater weight, you substantially restrict your range of motion and the number of chest muscle fibers you can engage (and grow).
To close the space between your back and the bench, lift your feet onto the seat or prop them up against a wall.
How to do it: Lie on a bench with the back at a 45-degree angle.
Lift your legs, placing your heels on the bench in front of your glutes, or pressing them flat on a wall or box in front of the bench.
Locking your elbows, lift a pair of dumbbells into the air.
Slowly lower the bells till your outside breast is touched.
Keep your elbows bent at a 45-degree angle, stop, and then quickly force yourself back up.
Conclusion
Exercises for the chest don’t have to be difficult, and some may even be done without any equipment.
Your chest will develop stronger with regular exercise and repetition, and your breathing and posture are likely to get better as well.


Add comment